Recently, we have received reports from many users that they had problems such as cutting errors and poor connections during the installation process. Therefore, I especially wrote an article to help you install smart LED light strips to solve your troubles.
Why Should You Install Smart LED Light Strips Correctly?
Proper installation ensures optimal performance and longevity of the light, preventing problems such as uneven lighting, premature burnout, or electrical hazards. It also ensures that the adhesive adheres well to the surface, preventing the lamp from falling and possible damage.
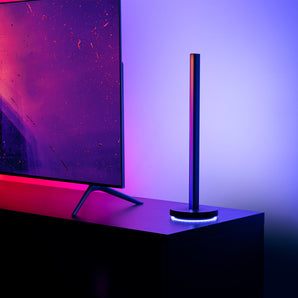
Additionally, proper installation allows for better functionality such as app control, voice commands, and automated setup. So properly installed LED strip lights can enhance the aesthetics of a space and ensure its safe and efficient operation.
What Are the Common Problems Encountered During the Installation Process?
During the installation of smart LED light strips, common problems include:
Surface adhesion problems: If the installation surface is not clean or the texture is not smooth (such as rough walls or ceilings), the light strip may not be firmly adhered.
Power and voltage mismatch: The light strip may not work properly due to a mismatched power adapter or inappropriate voltage.
Cutting errors: When cutting the light strip, if you do not cut according to the cutting points marked on the light strip, the LED or circuit of the light strip may be damaged, causing part or all of the light strip to not light up.
Connection issues: Incorrectly connecting various parts of the light strip can cause the light strip to not function properly or have inconsistent colors.
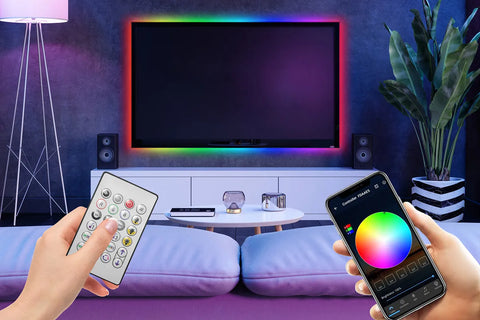
Difficulty in control and configuration: For smart LED light strips, configuration and control may be required via a smartphone app, remote control, or smart home system.
Thermal Issues: Light strips can overheat after prolonged use, especially in closed or poorly ventilated spaces.
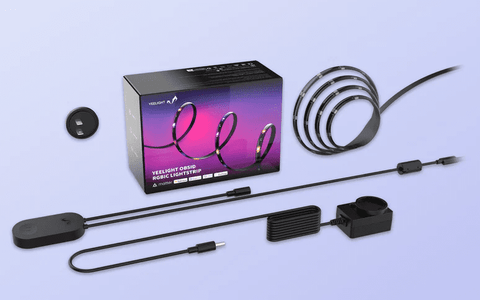
Tools You May Need to Install LED Strip Lights

When installing LED strip lights, here are some tools and materials that might be needed to ensure a smooth and efficient installation process:
Measuring Tools: Such as a tape measure or ruler, used for accurately measuring the length of the installation area and the precise points where the LED strip needs to be cut.
Cutting Tools: Scissors or a sharp utility knife are essential for making clean cuts on the LED strip at designated marks.
Connectors: These are useful for quick connections without the need for soldering.
Cleaning Supplies: Alcohol wipes or cleaning agents and a clean cloth to prepare the installation surface, ensuring strong adhesion.
Wire Strippers and Pliers: For preparing and adjusting wire connections.
Screwdriver: Needed if using mounting clips or brackets to secure the strips in place.
Double-sided Tape or Additional Adhesive: For surfaces that are uneven or where the strip's adhesive might not be sufficient, extra adhesives may be required.
Voltage Tester or Multimeter: To check the electrical connections and ensure everything is safe and correctly set up.
Using these tools appropriately according to your installation needs and the specifics of your LED strip lights can help you effectively complete the installation process.
How to Install Smart LED Strip Lights
Step 1: Planning Your Installation
Begin by planning the layout of your LED strip lights. Measure the area where you intend to install the strip and determine the total length needed. Consider the location of the nearest power outlet and how you'll manage any excess strip length.
Step 2: Preparing the Surface
Once you've mapped out your installation, prepare the surface by cleaning it thoroughly to remove any dirt or grease. This step is crucial for the adhesive to work effectively. If the surface is porous or uneven, you might need to use mounting clips or an aluminum channel for installation.
Step 3: Cutting and Connecting
If your LED strip lights need to be cut to fit the designated space, make sure to cut them only at the marked cutting points to avoid damaging the components. If your design requires angles or intricate layouts, you may need to use connectors to join strips without bending them.
Step 4: Adhere and secure light strips
Starting from one end, gradually peel off the protective film on the back while smoothly applying the light strip to the prepared surface. Avoid stretching the light strip to avoid deformation or damage.
Step 5: Wiring and Power
Connect the LED strip to the power source. Make sure the connection is strong and reliable. If your LED light strip is smart, it may need to be connected to a Wi-Fi bridge or hub, which should be configured according to the manufacturer's instructions.
Step 5: Testing and Securing
Before fully mounting the strip, connect it to the power source and turn it on to test if all sections of the light strip are working correctly. Once confirmed, peel off the adhesive backing, stick the LED strip firmly in place, and secure it with additional mounting clips if necessary.
By following these steps, installing smart LED strip lights can be a straightforward and rewarding DIY project. This guide will continue with additional tips and a summary to help you enhance your installation experience and ensure long-lasting results.
Summary
The above is the article about installing LED light strips. Please note that you should plan carefully before installation and use the correct tools and steps to complete it. Let smart LED light strips give our spaces enhanced beauty and illumination.
FAQ
1. How to cut LED light strips?
Cutting LED light strips is a simple process, but requires attention to detail to avoid damage. First, you need to identify the marked cutting points on the strip. These points are usually marked with a small scissor icon or a horizontal line on the strip to indicate where it is safe to cut.
Use a sharp pair of scissors to cut directly along these marked points. When cutting, make sure not to cut any wires or LED beads to ensure that the functionality of the strip is not affected. Once cut correctly, you can install or further connect the various sections of the strip as needed.
2. How to connect LED strips together?
Connecting LED strips together usually involves using specialized connectors or through soldering. First, make sure you have the same type of LED strip and only cut where it's marked "cutable."
If using a connector, properly align the cut ends of the light strip and insert them into the connector, making sure the metal contacts are in tight contact with the circuit points on the light strip. For a more secure connection, you can choose the soldering method and solder the wires directly to the solder points on the cut ends of the LED strips.
3. What are the maintenance recommendations for smart LED light strips?
Regularly wipe the surface of the light strip gently with a clean cloth and avoid using water or other liquid cleaning products. Check the light strip and power adapter for dust accumulation and regular cleaning to avoid overheating.